Building a Trustworthy Visual Timeline of Construction Progress
Tracking a construction project from start to finish is about more than keeping to a schedule. It is about creating a clear, honest record that everyone on the team can refer to. A well-documented visual history helps avoid disputes, supports claims, and shows exactly what was done at each building stage. Without a reliable record, important details can be lost or misremembered, leading to costly misunderstandings.
The best way to build this record is with aerial site imagery. Photographs taken from above give a true sense of the site layout, the sequence of work, and the pace of progress. But simply taking a few pictures now and then is not enough. You need a system. Here is how to set one up that works from the first day of excavation through to final finishes.
Plan the capture schedule around your project milestones
A construction schedule is full of natural checkpoints. Pouring a foundation, completing the steel frame, topping out, closing in the shell, roughing in mechanical systems, finishing interiors. Each of these moments is a milestone worth recording. Rather than flying a drone on a fixed calendar date, tie your aerial site imagery to these events. That way every image has a clear purpose and connects directly to the work actually done.
Before work begins, map out which milestones matter most. A high-rise might need weekly captures during the foundation stage because the sequence is dense. A housing development might only need monthly shots until the roof goes on. Think about what questions you will need to answer later. Did the concrete cure long enough before backfill started? Was the steel delivered on time? A good plan anticipates those questions.
Also decide the flight path for each capture. The same altitude, the same angle, the same time of day if possible. Consistency makes comparison easy. You can stack images from different capture dates and see changes instantly. If you vary the flight path each time, you lose that power.
Use a consistent naming and filing system
Raw image files from a drone are meaningless without context. A file called DJI_001.jpg tells you nothing. Set up a naming convention before the first flight. Include the project name, the capture date, and a short code for the building stage. For example: "Riverside_Tower_2025-03-15_Foundation." This makes finding a specific image quick, even years later.
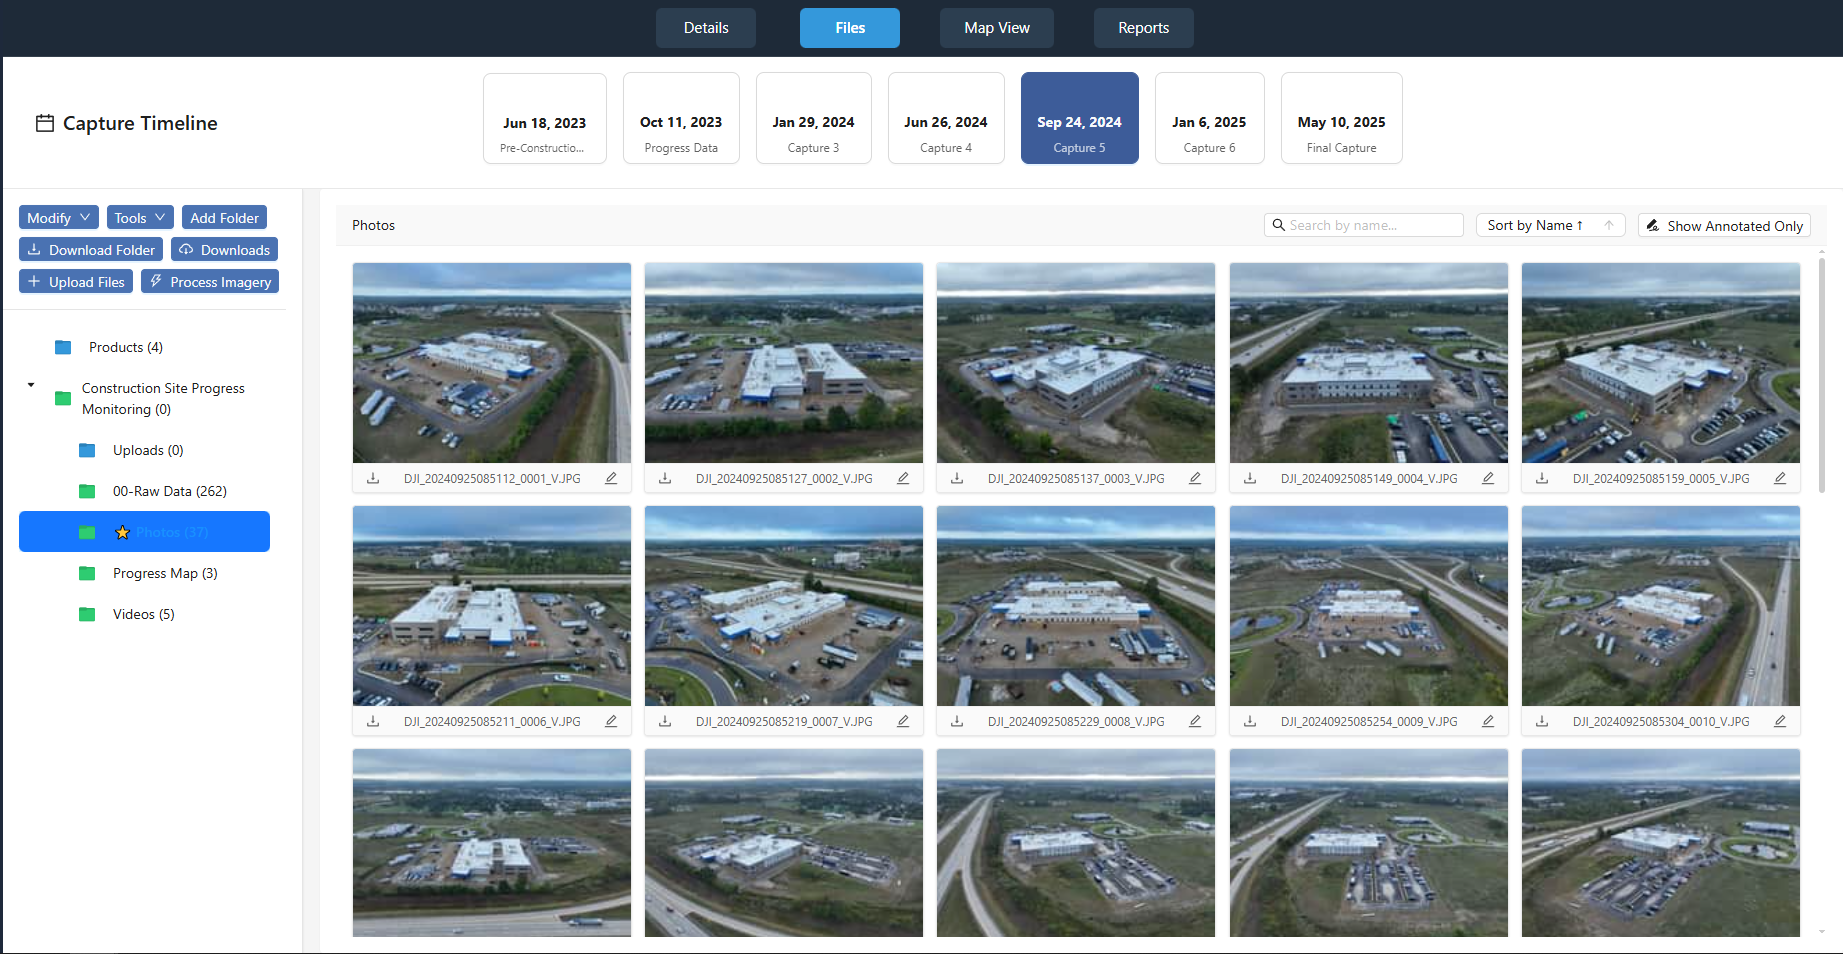
Store everything in a shared project portal where everyone on the team can see the progress report. The portal should show each capture date alongside the corresponding building stage. A simple spreadsheet can work, but a dedicated platform is better. Some services, like those offered at nationaldroneservices.net, provide a structured project portal that organizes aerial maps, 3D models, site imagery, and 360 panoramas in one place. That kind of setup saves time and reduces confusion.
Back up the files in two separate locations. Cloud storage is fine, but also keep a local copy on a hard drive. Construction sites are busy places, and data can be lost if someone accidentally deletes a folder. A redundant backup protects the record.
Capture more than just straight-down views
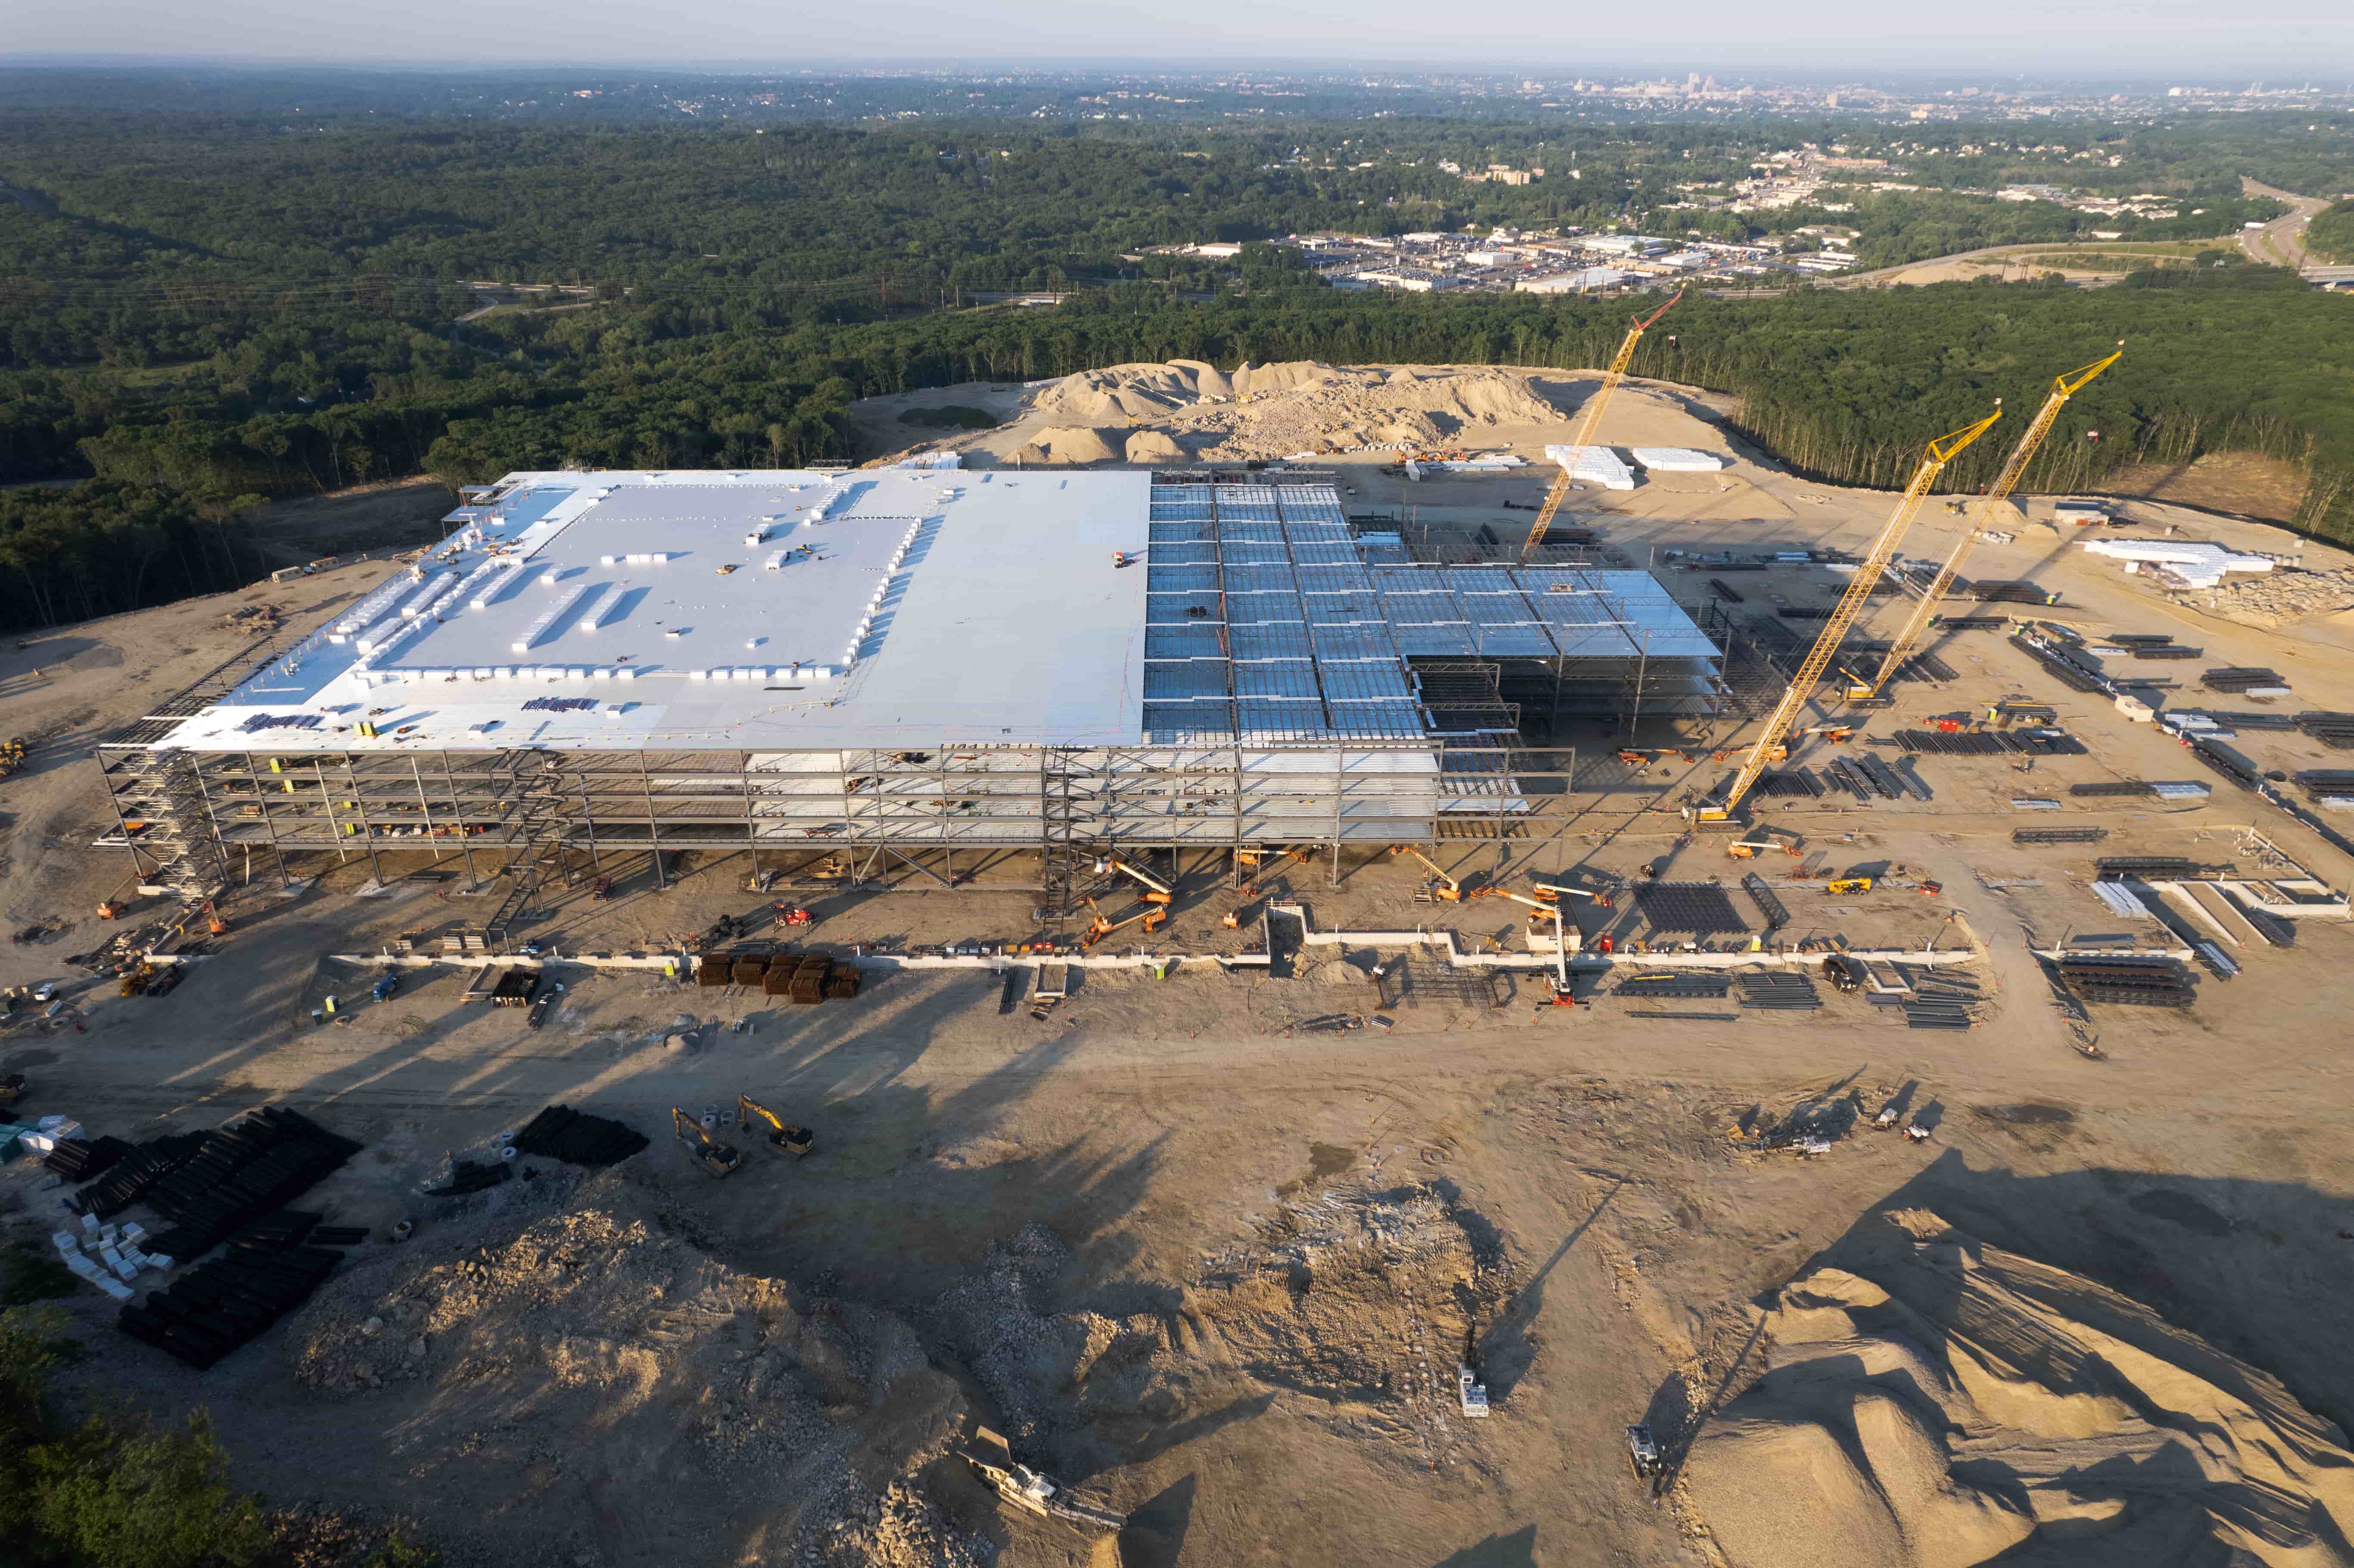
An aerial photograph taken straight down, also called a nadir shot, is useful for measuring distances and seeing the site layout. But it does not tell the whole story. Oblique shots taken at an angle show the height of structures, the depth of excavations, and the relationship between different parts of the site. They give a sense of volume that a top-down image cannot.
Also include close-ups of specific details. A crack in a retaining wall, a weld on a steel beam, the alignment of formwork. These close images become important later if a question comes up about workmanship or material condition. Combine them with wider shots so you can always see where the detail sits on the site.
If the project involves multiple buildings or phases, capture each one separately and then a composite of the whole site. That way you can zoom in on a specific building without losing the context of the overall progress.
Label every image with the correct capture date and building stage
It sounds obvious, but it is easy to let this slide. A drone operator might fly on a Tuesday, upload the files on Wednesday, and by Friday the date in the metadata is the only clue. But metadata can be stripped or changed. Write the capture date and building stage into the filename and also embed it in the image properties if possible. Some project portals do this automatically when you upload.
When you share the visual record with the client or the general contractor, include a simple legend that maps each capture date to the corresponding project milestone. This makes the record usable without a lot of explanation. It also helps during meetings when someone asks, "When did the roof membrane go down?" You can point to the image and the date together.
Review the record regularly and fill gaps
A visual record is only as good as its last update. Set a reminder to review the collection every month. Check that the images match the current building stage. If you missed a milestone, note it and decide whether to add a supplementary capture. Missing a foundation pour is not a disaster, but if you skip three milestones in a row, the record loses its value.
Also look for gaps in coverage. If the site has a large excavation that took two weeks, you probably want an image at the start, the midpoint, and the finish. A single shot at the end does not show how the work progressed. The same logic applies to demolition, grading, and landscaping.
If you notice that the drone images are not aligning well because the site layout changed, adjust the flight plan for the next capture. The goal is not perfect consistency at all costs, but a record that a reasonable person can use to understand the sequence of work.
Share the record in a format that everyone can use
A folder of high-resolution TIFF files is great for your own archive, but not everyone on the team needs that. Send a progress report with low-resolution previews plus a link to the full-resolution originals in the project portal. Keep the previews small enough to load quickly on a phone, because site managers are often walking the job and checking images on their mobile device.
If the client wants printed images for a boardroom presentation, export them at the right resolution and include the capture date and building stage in the corner of the print. Do not rely on people remembering which image belongs to which week.
Aerial site imagery is powerful because it gives an honest view of what happened. But the power comes from the system around it. A single drone flight is just a nice picture. A planned, documented, and reviewed set of flights is a reliable visual record that protects everyone involved. Whether you manage the process yourself or work with a service that provides structured captures and a project portal, the principles are the same. Plan ahead, stay consistent, and review often. That is how you build a record you can trust.
For teams that want a coordinated approach, a service like nationaldroneservices.net can handle the logistics and provide a project portal that keeps everything organized. The important thing is to start early and treat the visual record as seriously as you treat the construction schedule itself.